Image Map
Image Map

Wednesday, April 27, 2011

Paula Deen's Lean: Bananas Foster French Toast

Typically for breakfast, I am more of an eggs, turkey sausage, fruit and maybe an occasional oatmeal kind of gal. Pancakes, waffles and French toast look good, but they just aren't what I normally crave in the morning. Now this isn't ALL the time, but most of the time. I do have my moments. If it weren't for a recent recommendation from a Cookin' Lean reader, who knows how long it would have taken me to try this recipe out! I am so thankful Chelsea emailed me and asked that I try to "lean it out" because Paula Deen's recipe for Bananas Foster French Toast was incredible! I had seriously been missin' out on some breakfast goodness for way too long. As you can imagine, this started out as quite an indulgent dish. So much that the reason Chelsea asked me to tackle this recipe was because she just didn't know where to start. With all that butter, sugar and syrup, I can't say I blame her. It is easy to get lost in all that! So, I accepted the challenge, made some changes and created a lean variation to this breakfast dish that both your taste buds and waistlines will love. Rise n' shine...it's breakfast time!

BANANAS FOSTER FRENCH TOAST
Serves 5

INGREDIENTS
  • 1/2 cup Egg Beaters
  • 1/2 cup FAT FREE half-and-half
  • 1 teaspoon ground cinnamon
  • 1 package Pillsbury REDUCED FAT Crescent Rolls; baked and halved
  • 2 tablespoons dark corn syrup
  • 2 tablespoons firmly packed brown sugar
  • 3/4 cup LITE or SUGAR FREE maple syrup
  • 1/4 cup chopped pecans
  • 2 ripe bananas; sliced
  • 1 teaspoon rum extract
  • FAT FREE cooking spray
DIRECTIONS

In a shallow dish, whisk together Egg Beaters, half-and-half, and cinnamon. Warm a large skillet over medium-high heat and spray with FAT FREE cooking spray. Dip 4 crescent halves in egg mixture to coat both sides. Using a fork, remove crescents from egg mixture, letting excess mixture drip off. Place crescent halves in hot skillet. Cook 2 to 3 minutes per side or until lightly browned. Repeat procedure with remaining crescent halves. Set aside and keep warm.


In a large skillet, combine corn syrup, brown sugar, maple syrup and pecans. Bring to a boil over medium-high heat. Reduce heat, and simmer for 2 minutes. Add banana slices and rum extract. Coat with the syrup mixture, and simmer 1 minute. Spoon over French toast. Serve immediately.

RESULTS

I will use my husband's reaction to help describe how this turned out. He said, "Wow! This is awesome. It's restaurant quality; a signature dish." At that point I was both flattered and confused. Was I on a reality cooking show on Food Network? After all those shows I have us watching, he is starting to sound a little bit like Bobby Flay and the gang.


So we have concluded that the taste was amazing. What about the nutritional slim-down? See for yourself!

NUTRITION FACTS (per serving):

BEFORE (2 croissant halves & syrup mixture): 935.88 calories;  49.58g fat;  117.15g carbohydrate;  12.16g protein;  6.36g fiber


AFTER (3 crescent halves & syrup mixture): 348 calories;  10.89g fat;  59.07g carbohydrate;  7.34g protein;  2.52g fiber


SAVES: 587.88 calories;  38.69g fat;  58.08g carbohydrate


A big thanks again to Chelsea for recommending this recipe. Lady, once you try it out, please let us know what you think. Remember, I love making these recipes for my family AND for YOU! If you have a request, just send it my way.

ENJOY!


Tuesday, April 26, 2011

Livin' Lean Topic Tuesday: The Healthy Home


The Healthy Home: Simple Truths to Protect Your Family from Hidden Household DangersCreating a home that is healthy for our family is very important to all of us. We work hard to cook healthy meals, to keep our homes clean and to get our families movin'. We create nurturing environments where our children can grow into confident, well-adjusted people. It's a full-time job! Well, the making of a healthy home doesn't stop there, folks. As Dr. Myron Wentz and his son Dave Wentz explain in their book The Healthy Home, there are "...surprising health risks posed by the everday products and behaviors of any modern family."


Illustration from www.myhealthyhome.com.
DID YOU KNOW?
  • We poison our children and pets to kill a fly
  • The dirtiest, most polluted homes are often the ones that look and smell "clean"
  • The "new car smell" that I LOVE has a harmful source
  • Wearing your bra too tight puts stress on your lymphatic sytem (How's that for an excuse to hit up Victoria's Secret? I had to, honey. My health depended on it!)


The book, The Healthy Home: Simple Truths to Protect Your Family from Hidden Household Dangers, is one that will carefully help you identify areas in the home that may be a potential health risk to the family. There are colorful illustrations & quizzes; with each section pertaining to a specific area of the house (bedroom, bathroom, kitchen, living areas, garage & yard). There is a lot of information. However, for each "problem" or health risk, there is a simple solution.

To be quite honest with you all, and you know I always am, this book was a little overwhelming at first. As I started reading and realizing all of the things the Wentz team would find harmful about my house, I started to panic. How could I change all of this? I can't do all this stuff? There is so much to fix! I took some deep breaths and then it hit me. This is probably how some people feel when they read books on healthy eating or living. And what would my suggestion be to these people? I would tell them to take it one step at a time; gradually adding things little by little. So with this book, I'm taking some of my own advice and following that same approach. Take it one room at a time. Little changes can yield big results (the same with eating. Crazy coincidence). Regardless, my home will be getting healthier. As Dave Wentz puts it in the introduction, "...you don't have to be a scientist---or even a cave-dwelling technophobe---to protect your family from the toxic influences found in modern society."

I think this book is definately worth a read. If anything, it will get you thinking about the products we use daily and the habits we have that could be interfering with our quests for a healthy lifestyle. Oh, and don't be fooled by the cover. It looks pretty serious, but it is full of fun illustrations and is written in a way that is easy to understand and entertaining to read. To learn more about the book and how to create a healthy home, visit http://www.myhealthyhome.com/.

Thinking about picking up a copy? All author proceeds go to The Children's Hunger Fund! What great guys, right? Get your copy HERE!


About the Authors:
Dr. Wentz and Dave Wentz are a father-son team. Dr. Wentz has a PH.D. in Microbiology from the University of Utah. He founded Gull Laboratories, USANA Health Sciences and Sanoviv Health Institute. His son Dave is CEO of USANA and received his bachelor's degree in bioengineering from the University of California, San Diego. Donna K. Wallace is an accomplished writer who has co-authored several notable health books.

Friday, April 22, 2011

Paula Deen's Lean: Brunch Stuffed Peppers

Easter is right around the corner. Do you know what you are serving for brunch yet? How about these delicious and nutritious Brunch Stuffed Peppers. I found this recipe while lookin' around Paula Deen's site yesterday. Right away I knew this was the perfect recipe for any spring time or summer brunch. With a few changes, this recipe is now light AND filling; still packed with tons of flavor. You are gonna like this. Check 'em out!

BRUNCH STUFFED PEPPERS
Serves 4

INGREDIENTS
  • 4 large yellow bell peppers
  • 1 medium red potato; diced into small cubes
  • 10 pieces Canadian bacon; diced
  • 3/4 cup Egg Beaters or similar egg substitute
  • 1/2 cup FAT FREE shredded Cheddar cheese
  • 1/4 cup shredded Pepper Jack cheese
  • 3/4 cup 1% milk
  • 1/2 cup Bisquick Heart Smart baking mix
  • 1/4 cup FAT FREE sour cream
  • 2 tablespoons chopped green onion
  • 1/2 teaspoon salt
  • 1/4 teaspoon ground black pepper

DIRECTIONS

Preheat oven to 350 degrees F.

Spread potato pieces on a prepared baking sheet. Bake for 15 minutes.

While potatoes are baking, remove the top 1/2-inch of each pepper. Discard the tops and seeds. Arrange the peppers, cut side up, in an 8 by 8-inch glass baking dish. When potatoes have baked for 15 minutes, remove from the oven. Fill the bottom of each pepper evenly with the potatoes and diced Canadian bacon.


In a large bowl, combine the Egg Beaters, cheese, 1% milk, Bisquick Heart Smart mix, FAT FREE sour cream, green onion, salt, and pepper. Whisk until combined. Evenly distribute the egg mixture into each pepper. Bake until a wooden pick inserted in center comes out dry, about 45-55 minutes. Remove from the oven, garnish with cheese and serve immediately.


RESULTS

Here is why I love this dish:
  • THE COLORS~ The yellow peppers with the bright green onions...gorgeous!
  • EASY TO MAKE~ Mix everything, dump it in the peppers, throw in the oven & forget about it (for 45 minutes).
  • WELL-BALANCED MEAL~ Almost every food group is covered: milk, veggies, grains, meats. Have some sliced fruit on the side & you hit 'em all!
  • SO PRETTY~ That's self explanatory, right?
  • SO GOOD FOR YOU~ With great nutritional numbers, this dish proves to be a perfect fit for your Cookin' Lean kitchen.
  • AND IT TASTES GREAT!!
NUTRITION FACTS (per serving/ 1 stuffed pepper):

BEFORE: 655 calories;  41.45g fat;  27.9g carbohydrate;  36.04g protein;  4.12g fiber

AFTER: 243.5 calories;  4.34g fat;  36.95g carbohydrate;  22.32g protein;  3.98g fiber

SAVES: 411.5 calories & 37.11g fat !!


* Paula Deen's original recipe for BRUNCH STUFFED PEPPERS.

Tuesday, April 19, 2011

Livin' Lean Topic Tuesday: YOU Are an Inspiration

I find great inspiration others. These people are not all professional athletes, fit Hollywood stars, famous chefs or successful entrepreneurs. Although their stories can light a temporary spark of motivation within me, the ones that truly inspire me, offer direction and drive my determination to be my very best, are the people right around me. They are my family, my friends and especially my little Kimberlyn.

There is something I find quite fascinating about this. I would bet that if you were to ask these people if they considered themselves to be "an inspiration to others", they would probably say "no", "well, maybe", or at least have to think about it. It isn't because they aren't exceptional people, because they absolutely are. It is my belief that we simply aren't aware of the influence and affect we have on those around us. Our actions and words, direct and indirect, big and small, have an inevitable affect on the people in our lives.

I've learned that being aware of this is important; even more so since becoming a mother. As we strive to live better lives and to be better people, we are inspiring others to do the same. Think of this in a sense that we are in this together. Each of us, at different moments in our lives, are shining examples of what is possible, what is attainable and what can be. We remind each other of the strength that lives within all of us. When you look for inspiration in others, know that someone is looking to find inspiration in you. You are an inspiration.

Think about the things you do each day.

You go outside for a run. To the people driving by, you are an inspiration.

Bringing a healthy lunch to work. To the people who eat with you, you are an inspiration.

Doing push-ups & crunches in the living room.To your children, you are an inspiration.

Working, keeping a clean house & raising a family. To all of us, you are an inspiration.

Keeping a garden full of fresh veggies & herbs. To me, you are an inspiration.

Changing careers & following your true passion. To those wanting to do the same, you are an inspiration.

Smiling, even when life has dished out tough times. To those around you, you are an inspiration.


I could go on and on. The point is that each of us holds something to be admired; something that inspires. Sometimes they are the little things that we don't even think that inspire. As you go through your day, take pride in what you do, listen to the words you say and know that YOU are an inspiration to someone in your life. Yes, inspiration is all around us, but it lives within us too.

The purpose of our lives is to give birth to the best which is within us. ~ Marianne Williamson

When we do this, when we "give birth to the best which is within us", that is what truly inspires others. "Thank you" to the people in my life who have shown me their best.


Monday, April 18, 2011

Cooking Light with Rachael Ray: Jalapeno Popper Sliders

My husband has not stopped talkin' about these Jalapeno Popper Sliders since we saw them made on the Rachael Ray Show this past Monday. After you take a look at the recipe, you will certainly see why! This little burger encompasses all of the wonderful flavors you would find in a jalapeno popper; the cream cheese, cheddar cheese, cumin....and so on. I thought they looked good, but "good' doesn't even begin to describe how these Jalapeno Popper Sliders will taste when you bite into them. They were, and I quote Rudy on this one, "Perhaps the best burger I have ever had!" Now that says somethin'!

I give to you the much lighter, yet just as tasty, Jalapeno Popper Sliders!

JALAPENO POPPER SLIDERS
Makes 12 Sliders (12 Servings)


INGREDIENTS
  • 3 large jalapeno peppers
  • 1 Fresno chili pepper, sliced into 1/4 inch slices
  • Olive Oil cooking spray
  • 8-ounces FAT FREE cream cheese
  • 2 tablespoons yellow onion, grated
  • 1 large clove garlic, minced
  • salt and pepper
  • 1/2 teaspoon cumin
  • 1/4 cup fresh cilantro leaves, finely chopped
  • 2 pounds ground 95/5 extra-lean ground beef
  • 6 slices Reduced-Fat Sargento mild cheddar cheese; cut in half
  • 12 whole-wheat dinner rolls, sliced in half to create "burger bun"
DIRECTIONS
Pre-heat a griddle or grill to medium-high heat.


Cut the tops off the jalapeño peppers and, using an apple corer or fork handle, scoop out the seeds and slice into 1/8-1/4-inch rings. (Please don't use your fingers. I learned my lesson on this one; the hard way. Read more HERE.)


Place a small skillet over medium-high heat and coat with Fat Free Olive Oil cooking spray. Add the jalapeño peppers and Fresno chili pepper to the pan and toss for a couple minutes to char the edges of the peppers. The peppers should remain tender-crisp.


While the peppers are cooking, in a small mixing bowl, combine the softened FAT FREE cream cheese with the onion, garlic, salt and pepper, cumin and cilantro. Set aside.


Season the meat with salt and pepper and form twelve, 2-3-inch slider-size patties, thinner at the center and thicker at edges for even cooking. Spray griddle with olive oil spray, then cook on a hot griddle or grill for 2-3 minutes. Flip the patties and top with a spoonful of the cream cheese mixture, setting the mixture in place with a 1/2 slice of cheese. Cook for 2-3 minutes more with the grill top down or tent the patties with foil to melt the cheddar over the small mound of cream cheese.


Serve the sliders on rolls topped with the charred hot pepper slices.

RESULTS

Incredible! Fantastic! My new favorite burger when I am craving a burger. Now that spring is finally here (I think), the weather just puts me in the mood for grilling. These burgers are a great recipe that is easy to make and really just offers something different, yet familiar at the same time. What I love about this recipe is that I didn't have to leave anything out to make it lean. I simply substituted lighter versions of a few ingredients; cream cheese, olive oil, cheddar and beef. Instead of leaving off the bun, we traded in a brioche roll for a whole wheat dinner roll; cutting calories and giving us a little more fiber. The results yielded a slider that is about 150 calories and 17 grams of fat leaner! Take a look...
NUTRITIONAL FACTS (per serving):

BEFORE: 418 calories;  25.13g fat;  23.3g carbohydrate;  25.42g protein;  1.2g fiber

AFTER: 271.68 calories;  7.84g fat;  24.11g carbohydrate;  25.75g protein;  3.43g fiber

SAVES & ADDS: 146.32 calories;  17.29g fat;  + .33g protein;  + 2.23g fiber

To make this slider a meal, pair with a large salad of mixed greens, a mixture of roasted vegetables or some corn on the cob. I am sure you and your family will LOVE this recipe as much as we do! Go ahead and dig in, 'cause loaded burgers CAN be a part of livin' lean. Enjoy!


Friday, April 15, 2011

And the Winner Is...

STEPHANIE from Confessions of a Vegetarian Bakeaholic! Congratulations, Stephanie!

Stephanie is know the lucky owner of some gorgeous, custom made, vintage inspired, Swarovski Drop Earrings from LCVintage. LCVintage is a jewelry design line started by my sweet college friend, Lindsay. Lindsay has an eye for everything and anything  "chic". Check out her chic finds and more of her custom vintage jewelry designs on her blog, Chic to the Nines.


Thank you to everyone for entering and another huge thanks to LCVintage!!

Have a great weekend, everyone! The menu for next week includes Paula Deen's Bananas Foster French Toast; along with a few other favorites! How does that sound??? Be sure to check in next week to see what's cookin'! No school for me (spring break) = a lot more time to play in the kitchen! YAH!!


**Stephanie~ send me your mailing address to cookinlean@gmail.com as soon as you can! Thanks!


Thursday, April 14, 2011

Cooking Light with Rachael Ray: Buffalo Popcorn Chicken Bites

Just say the words "buffalo chicken" to me, and say no more. I love everything buffalo style; from dips to salads and entrees to sandwiches. To me, hot sauce paired with blue cheese is just a match made in heaven. My Hubby & I love buffalo chicken bites from almost any menu, so when I told Rudy that we were going to have a home-made, lean version of our favorite bar food, he was reeeeally excited to see how they turned out. As inspiration, I used Rachael Ray's recipe for Buffalo Popcorn Chicken Bites and as usual, she gave me a great place to start. Simple ingredients and easy directions; my kind of recipe.

Tell me what you all think about these healthy Buffalo Popcorn Chicken Bites~!

BUFFALO POPCORN CHICKEN BITES
SERVES 6

INGREDIENTS
  • 2 cups Heart Smart Bisquick Pancake Mix; divided
  • 1 cup water
  • 8-12 teaspoons hot sauce
  • 1-1/4 pounds boneless, skinless chicken breast cut into bite-sized pieces
  • 1 cup Marie's Lite Blue Cheese Dressing
  • 2 scallions, finely chopped
  • 1 teaspoon course black pepper
  • Cut celery and carrot sticks
  • Fat Free cooking spray
DIRECTIONS
Preheat oven to 425 degrees.

In a wide mixing bowl combine 1-1/2 cups of the Heart Smart Bisquick mix, 1 cup water and about 6 teaspoons hot sauce. Place the remaining plain 1/2 cup pancake mix in another wide mixing bowl. Arrange the batter and the bowl of plain pancake mix near the prepared baking sheet you plan on using; some sort of assembly line.

Toss the chicken pieces in 2 teaspoons of hot sauce then toss in the plain pancake mix, coat evenly and shake off excess. The plain dry pancake mix will help the batter stick to the chicken pieces. Add some of chicken to the batter, in batches. Using a fork, toss the bites in the batter. Remove the first batch from the batter, shaking off the excess batter as you carefully add them to the prepared baking sheet. Leave a little space in between so the bite don't cook together (like cookies if they are too close).

Bake each batch for 10-12 minutes. Remove from oven and season lightly with salt and pepper. Serve immediately with refrigerated, good quality creamy blue cheese  prepared dressing(Marie's Lite) with chopped scallions and black pepper stirred into it for dipping. Garnish platter with celery and carrot sticks.

RESULTS

I wasn't sure about baking these instead of frying; worried about how they would look and taste. But as you can see, they turned out pretty good! It was a great lesson to learn for future "fried food" make-overs. And the taste? It was wonderful! The only recommendation from the tasting panel (or my husband's friends over watching the Master's this past Sunday) was that the Buffalo Bites could have been a little spicier. This is why the ingredients list suggests 8-12 teaspoons. I used 8 on Sunday, but next time I will throw in a few more teaspoons. Hey, they asked for it!

Making a comparison on nutritional facts was tough on this one. The original recipe calls for vegetable oil for frying, but it doesn't give an exact amount. Plus, it isn't like you take in all the oil used for cooking as you would if the oil were in a cake or dressing. Same with the batter. You will have leftover batter too; which makes doing an accurate analysis tough. So, the best I could do was to find nutritional facts on "fried boneless buffalo wings" and use those as our estimate of what the recipe looked like before. For both the before and after, only the nutritional facts for the Popcorn Bite itself is figured, not the dressing. I will leave your dip up to you. Any store bought brand will have accurate facts on the back, so just check the label first.

An average serving of 6 fried boneless buffalo wings looks like this, nutritionally speaking...

BEFORE: 528 calories; 36g fat; 18g carbohydrate; 30g protein (from http://www.fatsecret.com/)

And after...
NUTRITION FACTS (per serving w/out dressing): 233.3 calories; 3.76g fat; 27.36g carbohydrate;  23.93g protein;  1.3g fiber


Baking this fun tailgating treat instead of frying it allows you to keep all the flavor, and forget all the guilt! Enjoy!


Tuesday, April 12, 2011

Livin' Lean Topic Tuesday: Time to Break Out the Tape

While enjoying a celebratory cocktail with a friend Saturday evening, we got on the topic of weight loss. She has been really workin' hard over the past several months; eating well and exercising. Recently, she hopped on the scale and expected to see some serious weight loss. This is a realistic expectation any of us would have after all that focus and hard work. However, the results were minimal. Instead of letting that number get her down, she simply broke out the measuring tape. And wouldn't you know, those numbers were lookin' so much sweeter than they had in the past. My friend is getting results; she just needed another set of numbers to get a better indication of how awesome she is doing.

I am so glad my friend and I had this conversation this past weekend, because it is so important to remember that weight does not tell us the whole truth. In fact, sometimes weight can be a deceptive little thing. When weight goes up, this could be fat gain or it could be muscle, but the scale is not going to be able to let you know which one it is. We see little movement on the scale and naturally get bummed out because we think whatever we are doing is not working. This is why taking measurements is a great way to track your progress.

Other ways to measure the effectiveness of our workout efforts is to note how we feel. Working out and eating well should make us more energetic, happier people. I personally go with the "how are my clothes fitting" as part of my approach to keeping my shape in check. However if your husband has the amazing ability to shrink everything he puts into the dryer, this may not be the right method for you.

Basically, don't let the number on a scale control you. That number is not the only thing that is expected to change when we change our eating and exercise habits, therefore don't let it be the only indicator of success.

Oh, and to my friend who inspired this post...did I mention how great you look? Well, you look fabulous!!! I am so proud of you. Keep it up, girl!


Saturday, April 9, 2011

Kimber's Korner: Mini Fruit Pizza

Have ya missed me? Well I have missed you! I'm back to share with you a yummy, sweet treat treat called Mini Fruit Pizzas. My mom's friend Paula makes a great, big fruit pizza out of cookie dough and that is the recipe that inspired us (Paula's Fruit Pizza). We are making pretty much the same thing, only these are fruit pizzas that are more my size; mini. Mom has us using a lighter cream cheese and left off the marmalade. We had tons of fun making these little pizzas and I am sure you will too. Check out how Mom and I worked together to create these Mini Fruit Pizzas!


MINI FRUIT PIZZAS
Makes 24 (or 12 servings)

INGREDIENTS
  • 1 package of Pillsbury pre-cut sugar cookies (24 cookies)
  • 1 8-ounce block FAT FREE Philadelphia Cream Cheese
  • 1/2 teaspoon almond extract
  • 3 cups fresh fruit (sliced bananas & strawberries, blueberries, kiwi, etc)
  • 1/2 cup orange marmalade (Optional)
DIRECTIONS

Preheat oven to 350 degrees.

Place cookie dough pieces on a prepared baking sheet (12-16 at a time). Bake 8 to 15 minutes or until firm. Cool completely. Mix together cream cheese and extract. Spread cream cheese mixture over cooled cookies. Arrange fruit in an way on top of each "mini pizza". If desired, lightly warm marmalade and brush over fruit.  We skipped this part with most of ours. You really don't need it! Serve immediately.

Enjoy!
~ Kimber

Friday, April 8, 2011

GIVEAWAY: LCVintage Jewelry that is "Chic to the Nines"

Happy Friday everyone! I was going to announce this giveaway next week, but I just couldn't take it any longer.

This giveaway is really exciting to me because the very chic earrings, that may be yours in the near future, were designed and made by my college friend, Lindsay. I met Lindsay my freshman year at Elon University and let me just tell ya, she has always had an eye for all that is chic. So when Lindsay told me about her blog, Chic to the Nines, I knew that the ladies of the world were in for a special treat! The vision behind her blog is finding "eye-candy" to inspire her chic designs and to inspire our inner chicness too! Well Linds, you are doing just that!

As mentioned, Lindsay is a jewelry designer of gorgeous vintage pieces; for weddings and everyday. Her line is called LCVintage. The pieces are beautiful and she has so kindly offered up a pair of Simple Swarovski Drop Earrings for this giveaway! She rocks! Here is what Lindsay has to say about these vintage-inspired earrings:

 Simply Stated Swarovski Crystal Drops that go with everything!

They are the perfect size to compliment your more simple day or a chunky necklace.

And of course, Lindsay only uses the Chicest of Materials...

Cute wedding party wearing LCVintage Swarovski Crystal Drops.

Chic Materials:


Swarovski Crystal - Swarovski Crystal components are regarded as the highest quality machine cut and polished crystal beads in the world. They have a beautiful shine that catches the light creating a sparkle effect.


Gold Filled Materials - Gold Filled materials contain a layer of gold over-top base metal. This is a better quality material that will not tarnish as easily.


Ok! So, how do you get your hands on these beautiful crystal drops? ENTER!

TO ENTER:

1- Leave a comment letting me know that you are following Chic to the Nines (GFC, Twitter, Facebook).

2-Leave a comment letting me know you are following Cookin' Lean (GFC, Twitter, Like Us on Facebook).

3- Just leave any sweet comment about about Chic to the Nines or LCVintage. (Tell us your favorite piece, why you would love these earrings, etc.)

Each follow or comment is an entry (example: If you follow Cookin' Lean and Chic to the Nines on GFC, Twitter and Facebook, that is 6 entries!)

**And if you Tweet about this giveaway or share it on Facebook...let me know because I will throw your name into the pot an additional time for each. How does that sound?!?!

Thanks again to Lindsay for making this giveaway possible! Please stop by and see my friend Lindsay to see what's chic and to check out more of her LCVintage pieces. She just posted ideas for a Tween Spa Party that you are going to love! I kinda want to have one of those parties for my friends.


YOU HAVE UNTIL THURSDAY APRIL 14th (11:59 pm ET) TO ENTER THIS GIVEAWAY. OPEN TO ALL US RESIDENTS. ONE WINNER WILL BE SELECTED AT RANDOM & WILL BE ANNOUNCED ON FRIDAY, APRIL 15th.


Good luck!
Custom Vintage Rhinestone Brooch Bridal Bracelet


I'll leave you with one last look at some of my favorite pieces. Aren't they great!?!?! I'm a proud friend. Can ya tell?

Custom Lauren Chunky Pearl Necklace


Thursday, April 7, 2011

Letting Go with SITS: It's OK to Take a Time Out From Cookin'

Preparing healthy meals for my family has become more important to me than ever since entering this wonderful world of cooking almost 2 years ago. I know that the "best" meals for us to eat are the ones we cook because we control what goes into them. All this cooking and experimenting with recipes has taught me many things; including the fact that cooking healthy meals doesn't always require a lot of time or effort. Cookin' lean is easy! No excuses, right? Even knowing all of this and being armed with new kitchen tricks, there are days where I just flat-out don't feel like cookin'. And when I feel like this, I feel a sense of guilt; as if I have failed to deliver on my promise to provide healthy, home-cooked meals for my family.

Tuesdays are the days where dinner is a bit of an afterthought. I teach all day, drive an hour home, stop by Starbucks for a Skinny Vanilla Latte and head right over to the University for my 3-hour class. By the time I get home and walk in the door, it is a little after 8 pm. It's late, I'm tired, my husband is asking me what we are having for dinner, I'm thinking "let's just order something"...and then the guilt sets in. Well, I am letting go! No more guilt! 

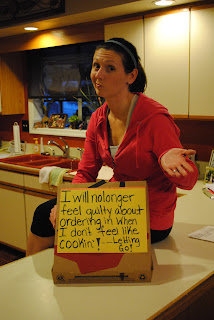
Whether it is Tuesday night or some other night in the week, there are going to be days where life just takes over my time and/or energy reserved for cooking. I can't feel guilty about it or feel like I have let my family down just because they don't get a home-cooked meal 7 nights a week. I may be the cook of the house, but that is just one of the hats I wear. It's time to cut myself a little slack and let this go. I will no longer feel bad about ordering in because I don't feel like cookin'! Instead I am going to enjoy the occasional treat and relax. I will cherish the small breaks from cooking, from doing dishes and from cleaning up the kitchen. 

Focusing on the things that I am doing well has allowed me to let go of something I felt I was "failing" at. Most of the time, we eat great in the Rudolph house. I shop for healthy snacks and make "cookin' lean" meals. So for me to take a night or two off a week is not such a big deal. I do a pretty darn good job most of the time and that hard work is deserving of a break. Could I think ahead and prepare something quick for us on those nights? Sure! But then when would pizza night or Chinese night fit in? I think I'll stick with my imperfection. I kinda like it now.

This post was part of the #SITS Letting-Go Link up. Do you have something to let go? Write up a post and share it HERE.


Tuesday, April 5, 2011

Livin' Lean Topic Tuesday: Become a Fitness Fashionista

It recently occurred to me that my fitness wardrobe is in SERIOUS need of an upgrade. The last piece of work-out attire I purchased was over 6 years ago! I am actually too embarrassed to disclose the age of my oldest sports bra. Let's just say that my best friend told me to throw it out a year ago...and I STILL have it. Trust me, it is bad, folks. Bad.

Fila Strappy Back Tank seen in People StyleWatch.


I suppose the reason this never really bothered me is because I am the only one that has to look at these terrible workout clothes... for the most part. Since ending my gym membership three years ago and creating our home gym, how I look while working out hasn't mattered all that much. I could run in my underwear and nobody would ever know. As nice as the privacy has been, I seem to have forgotten the benefits to lookin' good while working out. Allow me to explain.


Consider the way a new outfit makes you feel when going out to meet friends. Or think about how a nice suit makes you feel as you walk into that job interview. Even when no one else can see, tell me how a new hot set of bra and panties makes you feel. What do all these clothes give you? Confidence! And how does confidence make you feel? Great! Happy! And when we feel great and happy, we are more likely to do a better job at whatever we are doing. In this sense, we are talking about getting the best out of our workout.


Sports Bra by Old Navy.

As silly as it may sound, I believe there is a lot of truth to this. And for that reason, I am officially on a mission to become a fitness fashionista. Goodbye high school JV show t-shirt from 1998! So long sports bra from ???? (ha, ha...still not telling)! It's time to show my workout clothes that they matter too. I don't have the funds to make it happen overnight, but little by little, one cute workout top at a time (like the Fila top or Old Navy sports bra seen in pics), I will get there.

If this sounds like you, then come along and join me in finding your inner fitness fashionista! Do this for YOU! I am.

Monday, April 4, 2011

Cooking Light with Rachael Ray: Rigatoni with Grilled Beef & Gravy

I probably shouldn't have, but I made a dish with the word "gravy" in it while my husband was out of town. Knowing him, he's not going to be happy when he reads this one! But before he goes and gets all depressed about it, he needs to know that I loved this dish so much, I would have no problem makin' it all over again when he gets home. Now that's love for ya!

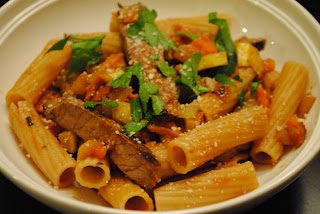
To adjust Rachael Ray's Rigatoni with Grilled Beef & Gravy to meet the lean standard, I cut the EVOO, steak and pasta portions by about half. To make up for it, I "beefed-up" the veggies and added some squash too. Overall, it was wonderful! It's a healthy dish with vibrant colors, flavor and aroma. Take a look!

RIGATONI with GRILLED BEEF & GRAVY
Serves 4

INGREDIENTS
  • 1 lean flatiron steak
  • salt and ground black pepper
  • 1/2 tablespoon Extra Virgin Olive Oil
  • Olive Oil Cooking Spray
  • 1/2 pound Whole Wheat Rigatoni
  • 1 small onion, finely chopped
  • 2 ribs celery, finely chopped
  • 1 cup carrot chips (or 2 small carrots), finely chopped
  • 2 medium yellow squash, chopped
  • 4 cloves garlic, finely chopped
  • 2 smalls sprigs rosemary, finely chopped
  • 2 tablespoons tomato paste
  • 1-1/2 cups Low-Sodium/Fat Free beef broth
  • 1/2 cup dry red wine
  • 1/2 tablespoon worcestershire sauce
  • 4 teaspoons grated Parmesan (garnish)
  • 1/2 cup chopped flat-leaf parsley
DIRECTIONS

Season the steaks with a little salt and plenty of pepper. Pre-heat a large cast iron skillet or griddle over high heat. Spray skilled with olive oil cooking spray and cook, turning once, for 8-10 minutes for pink centers. Let the meat rest until cool enough to handle, then slice very thinly on a diagonal.

Bring a large pot of water to a boil, salt it, add the pasta and cook until al dente. Drain pasta and set aside.

Meanwhile, in a large skillet, heat 1/2 tablespoon EVOO over medium-high heat (spray with addition EVOO cooking spray; if needed). Add the onion, celery, carrot, squash and garlic; season with the rosemary, salt and pepper. Cook until the vegetables are softened, 5-6 minutes. Stir in the tomato paste for 1 minute. Stir in the beef stock, wine and Worcestershire sauce; lower the heat and simmer.

Add the sliced meat to the gravy, then add the pasta. Serve in shallow bowls and top with a teaspoon of cheese and some parsley.


RESULTS

I just loved it! Dishes like this show it doesn't have to take long to create an impressive dish. In fact, I was able to cut quite a few corners putting this together. For the steak, I used a flatiron that I had grilled the night before. This was a great way to repurpose that leftover; just slice it up and toss it in. For the carrots, since I already had some snacking carrot chips on hand, I chopped those up instead of having to go to the trouble of peeling. It's no a huge deal, but when you are busy, busy (like most of us are) every little minute counts. Not having to grill the steak or peel the carrots probably saved me about 15 minutes. No bad!

Now let's get to the facts; the nutrition facts. What did we save with this one? Let's take a look.

NUTRITION FACTS (per serving): 376.5 calories;  8.03g fat;  55.36g carbohydrate;  22.11g protein;  9.1g fiber

BEFORE: 818.75 calories;  21.15g fat;  103.52g carbohydrate;  45.62g protein;  6.83g fiber

SAVES: 442.25 calories;  13.12g fat;  48.16g carbohydrate


Friday, April 1, 2011

Create Your Own Cocktails Just Like A Pro!

DIY Cocktails: A simple guide to creating your own signature drinksFor most of my drinking days (since age 21, of course), I have been what is considered to be simple drinker. I enjoy wine, beer and an occasional 2-3 ingredient cocktail; which involves nothing more than a simple pour and stir. Nothing too fancy or complicated. Those "other" cocktails are better left to a professional mixologist...so I thought.

Recently I was sent an email about this new book called DIY Cocktails. In DIY Cocktails (Adams Media April 2011), authors Marsha Simmons and Jonas Halpren give easy-to-understand tips and techniques on creating your own signature cocktails. In the first part of the book you'll learn the basics of mixology including: ratios, techniques, barware, and preparing ingredients. The second part incorporates recipes for both classic and unique cocktails to help you build your own drink. I think of it as bartender home-schooling; where the lesson is reading part one and the application/practice part is making drinks and testing them out. I just might become a master mixologist after all!

To get you started on the weekend, I wanted to include an excerpt from DIY Cocktails. It includes a fresh, delicious lookin' cocktail that is sure to please your palate. Check it out!

Watermelon-Cucumber Refresher

INGREDIENTS
  • 3 parts vodka  -  (3 parts strong)
  • 1 part triple sec - (1 part sweet)
  • 1 part watermelon-cucumber-mint-juice** - (1 part sweet)
  • 1 part lime juice - (1 part sour)
Total Ingredient Ratios: 3 part strong: 2 part sweet: 1 part sour

 Pour all ingredients into a cocktail shaker with ice and shake for about fifteen seconds. Strain into a chilled cocktail glass. Optional: Freeze two watermelon chunks and place them inside the glass. Garnish with a cucumber slice and a spring of mint.


**Watermelon-Cucumber Mint Juice


~ 2 parts chopped watermelon

~ 1 part peeled and chopped cucumber

~ 2 sprigs of mint

Blend all ingredients together and strain through fine-mesh strainer.  
 
 
 How Did We Do That?

We started out knowing that we wanted to use watermelon, which is moderately sweet and rounds out flavors. But watermelon wasn't enough for us; we wanted more! So the next step was to ask ourselves, "What other ingredient is similar to watermelon in taste but is also a little less sweet so the watermelon can be the dominant sweet flavor?" Turns out cucumber is a lot like a milder, slightly more tart melon: It's not going to overpower, but it will offer a little hint of tartness to add another layer to our concoction. With all these fresh, juicy ingredients, we wanted a little bit of oomph -- something to give it that fresh-from-the-garden taste. Mint is a sweet herb that has a cooling effect, just what we wanted on a hot day. However, these ingredients are light and mild -- liquor and lime juice could easily overpower them. To add enough sweetness to round out the acidity of the lime, we knew we'd need something sweeter with a little weight to it. We always have triple sec in the liquor cabinet, and its orange flavor is a nice compliment to lime.

That's a lot of ingredients to fit into one little ratio. But when you look carefully you'll recognize the same flavor categories and ratio that make a margarita taste good:

3 Parts Strong - That's vodka. We chose vodka because it is a friendly spirit -- you won't find a flavor it doesn't mix well with -- and we wanted to introduce a lot of other flavors to the party.

2 Parts Sweet - Remember how a Cosmo uses two different ingredients for its sweet -- a juice and a liqueur? That's basically what we did here. Only instead of using just one juice flavor we chose three -- cucumber, mint, and watermelon -- and combined them in the blender. Here's where you'll use fresh fruits and herbs of your choice.

1 Part Sour - You'll recognize good old lime juice, one of the basic sours. Since we had so much going on in the sweet, the simplest way to balance the cocktail was to use limes for acidity.

The above is an excerpt from the book DIY Cocktails: A Simple Guide To Creating Your Own Signature Drinks by Marcia Simmons and Jonas Halpern. The above excerpt is a digitally scanned reproduction of text from print. Although this excerpt has been proofread, occasional errors may appear due to the scanning process. Please refer to the finished book for accuracy.

Copyright © 2011 Marcia Simmons and Jonas Halpern, authors of DIY Cocktails: A Simple Guide To Creating Your Own Signature Drinks 
 
I can't wait to get my copy of this book in the mail. Can't wait to get your hands on a copy either? Click HERE to order one...or two.
 
For more information, visit www.drinkoftheweek.com or follow the authors on Twitter.
 
CHEERS to a wonderful weekend!


LinkWithin

Related Posts with Thumbnails